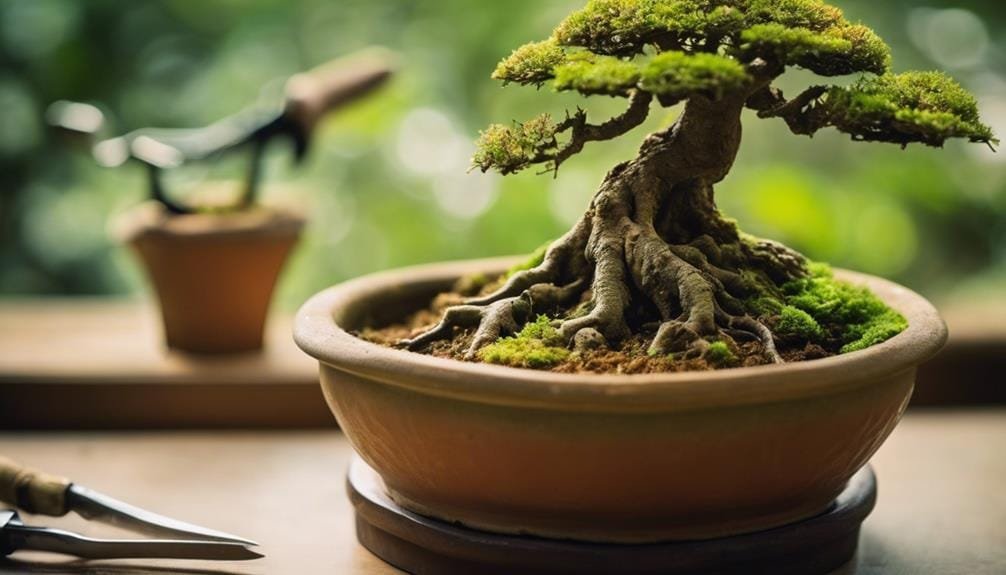
When removing a bonsai from its pot, gentle manipulation is vital to prevent root damage. Begin by preparing the pot, loosening the bond between roots and pot with a bonsai repotting tool. Gentle tapping and shaking help release the root ball, while a root hook provides necessary assistance. Soaking the bonsai in water lubricates the roots, reducing the risk of damage. Inspect the root system, pruning dead or damaged roots, and separating tangled roots from potting mix. Handle the root ball with care, supporting it gently, and minimizing handling time. As you shift your bonsai to its new home, a world of possibilities unfolds.
Key Takeaways
- Gently tap the pot to loosen the root ball, minimizing bonsai stress and root damage during extraction.
- Thoroughly soak the bonsai in water to lubricate the roots and potting media, reducing the risk of damage.
- Use a root hook or chopstick to carefully dislodge roots adhered to the container, avoiding forceful prying.
- Inspect the root system to identify and address potential issues, such as circling, kinked, or dead roots, before repotting.
- Handle the root ball with care, supporting it gently and avoiding sudden movements to prevent jolting or shaking.
Understanding Bonsai Root Systems
A bonsai tree's root system, comprising the root ball and root structure, plays a pivotal role in its overall health and stability, making it essential to understand its composition and behavior before attempting to remove the tree from its pot.
A healthy root system is indispensable for maintaining bonsai root health, as it enables the tree to absorb essential nutrients and water.
However, if the roots have become bonsai rootbound, they may have grown in a circular pattern, tightly bound to the pot's interior, making extraction challenging. This can lead to bonsai root damage, which can be detrimental to the tree's health.
Understanding the root system's behavior is critical in preventing such damage. By gently inspecting the roots, you can identify any potential issues, such as root circling or kinking, and adjust your repotting techniques accordingly.
This careful attention to the root system will guarantee a seamless shift to the new pot, minimizing stress and promoting continued growth.
Preparing the Pot for Extraction
With the root system assessed and any potential issues identified, attention can now be turned to preparing the pot for extraction, a step that requires careful consideration to minimize root disturbance and facilitate a smooth removal process.
As bonsai repotting involves carefully removing the tree from its pot, a crucial aspect is to loosen the bond between the roots and the pot's interior.
Start by gently running a bonsai repotting tool, such as a root hook or a chopstick, around the inside of the pot to dislodge any roots that have adhered to the container.
This careful manipulation helps to reduce the risk of root damage during the removal process.
Next, inspect the pot for any areas where the roots may be particularly entwined, taking note of any stubborn sections that may require extra attention.
Gentle Tapping and Shaking
You can begin to coax the bonsai from its pot by gently tapping the container's sides, working your way around the circumference to loosen the root ball's grip.
This gentle tapping helps to minimize bonsai stress by gradually releasing the roots from their pot-bound state. As you tap, carefully observe the bonsai's response, watching for signs of resistance or ease.
This attention to detail is vital in bonsai care, as it allows you to adjust your technique accordingly.
Next, gently shake the pot, again working your way around the circumference.
This subtle agitation helps to dislodge the roots from the pot's interior, further loosening the root ball. Be patient and deliberate in your movements, taking care not to jar or jolt the bonsai.
By combining gentle tapping and shaking, you can effectively coax the bonsai from its pot, minimizing root damage and reducing bonsai stress.
This delicate balance of gentle persuasion and careful observation is a hallmark of expert bonsai techniques, and with practice, you can master this critical step in the repotting process.
Using a Root Hook for Assistance
Gentle tapping and shaking may not be enough to loosen a stubbornly pot-bound bonsai, and in such cases, employing a root hook can provide the necessary assistance to carefully pry the root ball free.
This tool is particularly useful for bonsai for beginners, who may not be familiar with the delicate dance of repotting.
The root hook's curved end allows for gentle yet firm manipulation of the roots, carefully coaxing them away from the pot's interior.
As you work the hook around the perimeter of the pot, take care to avoid damaging any roots, especially those delicate feeder roots that are essential for the tree's health.
With patience and finesse, the root hook can help you successfully extract the bonsai from its pot, minimizing root damage and setting the stage for a successful repotting.
Watering and Soaking Techniques
Prior to repotting, a thorough soaking of the bonsai in water can help loosen the roots and reduce the risk of damage during extraction, making the entire process less stressful for the tree.
This simple yet effective technique allows the roots to relax, releasing their grip on the pot's interior.
By submerging the pot in a bucket of water or gently flooding the soil surface, the water seeps into the root ball, lubricating the roots and potting media.
As the roots absorb the water, they begin to release their hold, making it easier to remove the bonsai from its pot.
This gentle method not only minimizes root damage but also reduces the risk of potting media adhering to the roots, making the repotting process smoother and more efficient.
Loosening Roots With Tools
When the soaking technique is insufficient to release the bonsai's roots from the pot, utilizing specialized tools becomes necessary to loosen the root system without causing damage. This delicate process requires finesse and care, as the roots are fragile and easily damaged.
To effectively loosen the roots, the following tools can be employed:
- Root hook: A long, curved instrument used to gently pry the root ball away from the pot's interior.
- Pot scraper: A flat, blunt tool used to scrape away any roots that have grown into the pot's drainage holes or crevices.
- Root rake: A small, handheld rake used to gently tease out roots that have become tangled or knotted.
- Tapping tool: A small, blunt instrument used to tap the sides of the pot, loosening the roots and encouraging them to release their grip.
Assessing the Root Ball Condition
As the bonsai is carefully freed from its pot, the root ball is revealed, a tangled network of roots and soil that holds the secrets of the tree's hidden life.
It is essential to examine the root ball closely, inspecting its texture, color, and structure to gain insight into the tree's overall health and liveliness.
Root Ball Examination
The root ball, now exposed, should be carefully examined to assess its condition, identifying any signs of circling, girdling, or matting that may impact the bonsai's health and require adjustments to the repotting process.
A thorough examination allows the bonsai enthusiast to understand the root system's structure and identify potential issues that may need to be addressed during the repotting process.
When examining the root ball, consider the following key factors:
- Root density: Are the roots tightly packed or do they have room to breathe?
- Root direction: Are the roots growing in a circular pattern or are they directed outward?
- Root entanglement: Are the roots tangled or knotted, potentially restricting growth?
- Soil condition: Is the soil dry, moist, or waterlogged, and does it contain any debris or pests?
Root System Inspection
Careful examination of the root ball's condition is essential, as it reveals pivotal information about the root system's structure and health.
A thorough inspection allows you to identify any potential issues, such as root bound conditions, root rot, or other damage, which can inform your pruning and repotting strategy.
Begin by gently removing any debris or old potting media from the root ball, taking care not to disturb the roots themselves.
Next, inspect the roots for any signs of damage, disease, or pests, making note of any areas that require special attention.
Examine the root ball's shape and structure, noting any areas of congestion or circling roots, which may need to be addressed during pruning.
This thoughtful and deliberate approach to root system inspection sets the stage for a successful repotting process, allowing you to tailor your techniques to the unique needs of your bonsai tree.
Identifying Root Binding and Damage
During the repotting process, it is essential to inspect the root system for signs of binding or damage, which can occur when roots have grown tightly around the pot's interior or circling around themselves, restricting water and nutrient uptake. This vital step helps identify potential issues that may hinder the bonsai's growth and development.
When inspecting the root system, look for the following signs of root binding and damage:
- Circling roots: Roots that have grown in a circular pattern, often indicating constriction and limiting water and nutrient absorption.
- Kinked roots: Roots that have become twisted or bent, restricting flow and causing damage to the root system.
- Constricted roots: Roots that have grown tightly around the pot's interior, limiting root growth and expansion.
- Dead roots: Roots that have become necrotic, brittle, or discolored, indicating damage or decay.
Dealing With Pot-Bound Roots
Removing a bonsai from its pot often reveals a tangled web of pot-bound roots, which must be addressed promptly to prevent continued constriction and promote healthy growth.
These roots, having outgrown their container, have become entwined and constricted, hindering the tree's ability to absorb essential nutrients and water.
To gently free the bonsai from this restrictive environment, start by carefully inspecting the root system, taking note of the extent of the binding.
Using a gentle, sweeping motion, work your way around the pot, loosening the roots from the interior with a root hook or similar tool.
Avoid using excessive force, as this can cause further damage to the delicate root system.
As you work, take care to preserve as much of the root mass as possible, ensuring the bonsai's continued health and stability.
Pruning Dead or Damaged Roots
After liberating the bonsai from its pot-bound roots, attention turns to the pruning of dead or damaged roots, a vital step in repotting that guarantees the tree's continued health and vigor.
This delicate process requires a gentle yet firm approach, as the goal is to remove only the compromised roots, preserving as much of the healthy root system as possible.
To prune dead or damaged roots effectively, follow these essential guidelines:
- Identify damaged roots: Carefully inspect the root system, looking for signs of decay, brittleness, or discoloration.
- Cut with precision: Using sharp, sterile tools, carefully cut the dead or damaged roots at the point where they meet healthy tissue.
- Make clean cuts: Verify that cuts are smooth and angled, allowing the healthy roots to heal quickly and minimizing the risk of infection.
- Monitor and adjust: Keep a close eye on the bonsai's recovery, adjusting pruning techniques as needed to promote the tree's ideal health and stability.
Separating Roots From Potting Mix
With the bonsai tree now free from its pot, attention shifts to separating the roots from the potting mix, a crucial step in preparing the root system for pruning and replanting. This delicate process requires patience and care to avoid damaging the roots or disrupting the soil structure.
| Technique | Benefit | Caution |
|---|---|---|
| Gently teasing apart roots | Preserves root structure | Risk of breaking fine roots |
| Using a gentle stream of water | Loosens potting mix | May wash away tiny roots |
| Employing a root comb | Detangles roots efficiently | May cause root breakage if forced |
| Applying a root loosening agent | Reduces soil adhesion | Follow instructions carefully to avoid root damage |
| Working from the bottom up | Preserves root ball integrity | Requires patience and control |
Handling the Root Ball With Care
Once the roots are separated from the potting mix, attention turns to handling the root ball with care, as rough handling can cause further damage to the roots and disrupt the soil structure. It is essential to treat the root ball with gentle reverence, as if cradling a delicate, living being.
To guarantee the bonsai's roots remain intact and undisturbed, follow these guidelines:
- Support the root ball: Gently cup the root ball in both hands, making sure to provide adequate support and balance.
- Avoid sudden movements: Move slowly and deliberately to prevent jolting or shaking the root ball.
- Keep the root ball moist: Maintain a consistent level of moisture to prevent the roots from drying out.
- Minimize handling time: Handle the root ball for as short a time as possible to reduce stress on the bonsai.
Placing the Bonsai in Its New Home
As the bonsai is carefully freed from its pot, attention turns to preparing its new home, where a harmonious union of tree, soil, and container will foster continued growth and serenity.
The gentle placement of the bonsai in its new pot marks a pivotal moment, one that requires thoughtful consideration of soil composition, pot selection, and secure placement techniques.
Soil Preparation
After carefully removing the bonsai from its pot and pruning its roots, the next crucial step is to prepare a well-draining soil mix that will provide a nurturing environment for the tree's continued growth.
This new soil will serve as a foundation for the bonsai's future development, providing essential nutrients and support.
To create a superior soil mix, consider the following key components:
High-quality potting soil: A well-balanced potting soil will provide a solid foundation for the bonsai's growth.
Organic matter: Adding organic matter such as peat moss or compost will help retain moisture and regulate soil temperature.
Perlite or vermiculite: Incorporating perlite or vermiculite will improve soil drainage and aeration, preventing waterlogged soil.
pH balancing agents: Adding pH balancing agents like limestone or sulfur will guarantee the soil pH is suitable for the bonsai species.
Pot Selection Guidance
With the bonsai's roots pruned and its new soil mix prepared, selecting an appropriate pot is crucial to providing a harmonious environment that complements the tree's aesthetic appeal and supports its ongoing development.
A well-chosen pot will not only enhance the bonsai's visual appeal but also promote healthy growth and stability.
Consider the bonsai's species, age, and size when selecting a pot, as well as the desired style and aesthetic.
A pot that is too large can cause the soil to become too wet, while one that is too small can restrict root growth.
Opt for a pot that is proportional to the bonsai's size, with adequate drainage holes to prevent waterlogged soil.
The material and color of the pot should also be considered, as it can impact the overall visual harmony of the bonsai.
Secure Placement Tips
Proper placement of the bonsai in its new pot is essential to preventing root disturbance and guaranteeing a seamless shift. This pivotal step requires attention to detail and a gentle touch, as the bonsai is still recovering from the repotting process.
To secure a stable and comfortable passage, follow these placement tips:
Handle with care: Gently lift the bonsai by the root ball, taking care not to disturb the roots or dislodge the soil.
Position with precision: Place the bonsai in the new pot, guaranteeing the root flare (where the trunk flares out at the base of the tree) is level with the soil surface.
Soften the soil: Gently firm the soil around the root ball, taking care not to compact it too tightly, which can hinder root growth.
Water with intention: Water the bonsai thoroughly, allowing the soil to settle and the roots to establish themselves in their new home.
Frequently Asked Questions
How Often Should I Repot My Bonsai Tree to Prevent Root Bound Conditions?
As a general rule, bonsai trees require repotting every 2-5 years, depending on species, age, and growth rate, to prevent root bound conditions and guarantee peak health, vigor, and continued development.
Can I Use a Sharp Object to Remove the Bonsai From Its Pot?
Just as a surgeon's scalpel requires precision, using a sharp object to remove a bonsai from its pot demands caution, lest you sever delicate roots; instead, opt for gentle, careful methods to avoid inflicting harm on your miniature masterpiece.
Will My Bonsai Tree Survive if I Accidentally Damage Its Roots During Repotting?
When accidental root damage occurs during repotting, the bonsai's survival depends on the extent of the damage and prompt corrective action. If caught early, gentle pruning and proper care can facilitate recovery, but severe damage may lead to tree decline or loss.
How Do I Know if My Bonsai Tree Is Too Stressed to Be Repotted Immediately?
'A million tiny stress signals can scream 'wait!' – inspect your bonsai's color, droop, and leaf drop to gauge its stress levels; if it's struggling, delay repotting until it recovers, ensuring a smoother shift to its new home.'
Can I Repot My Bonsai Tree in the Same Pot With Fresh Soil?
While it's tempting to reuse the same pot, it's generally recommended to repot your bonsai tree into a clean pot with fresh soil to prevent the transfer of Potential pathogens and pests, ensuring a healthy start for your tree.
Conclusion
Removing bonsai from pots requires finesse, as the ancient adage 'gentleness is strength' aptly reminds us.
By mastering the techniques outlined above, bonsai enthusiasts can minimize root damage and guarantee a smooth shift to a new pot.
As the bonsai settles into its new home, its roots will slowly unfurl, much like the unfolding of a lotus flower, symbolizing growth, renewal, and the harmony between nature and human care.

