Here’s a trivia for you: About 30 percent of garbage is made up of paper items, junk mail, and food scraps.
Now for the fun fact: There is an interesting, and, in some cases, even enjoyable, solution to this!
Vermicomposting, commonly referred to as worm composting, is an easy approach to cutting down on household waste that can be done regardless of whether you dwell in a small apartment or a big house. You can turn your food scraps into compost gold and lessen your dependency on landfills, which are rapidly filling up, by piling them with dry items such as discarded paper products and adding the secret ingredient—worms.
Why Make Vermicompost?
Composting is a great approach to minimize the harmful effects on the environment while also producing a healthy and useful soil additive. However, many of you might not have enough outdoor space at your residence for a conventional compost heap.
Vermicompost is a great choice in this situation since it enables compact indoor composting. All you have to do is make a worm bin and dump all your food leftovers in it so the worms can eat them and turn them into rich soil.
Advantages of Vermicomposting
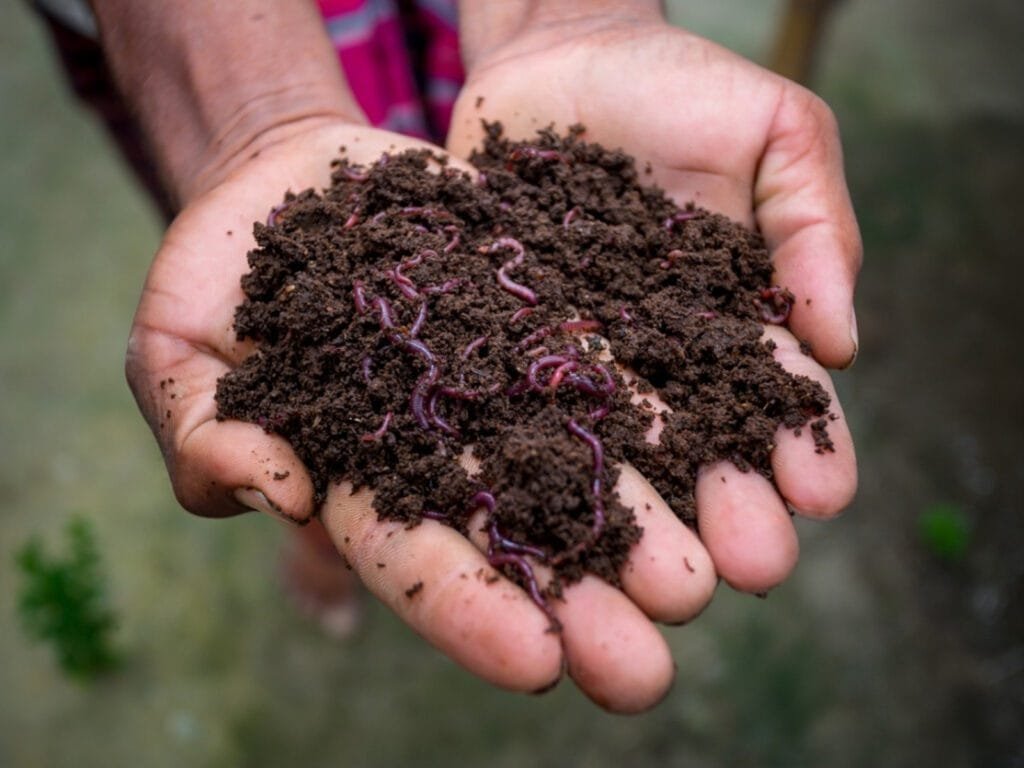
Earthworms consume organic matter and aerobically decompose it at room temperature with the help of micro and macro-organisms to produce vermicompost. Vermicomposting, often known as worm composting, creates a rich organic soil supplement that is full of beneficial microbes and a variety of plant nutrients.
Vermicomposting has a number of advantages, but the two most well-known ones are (1) turning waste into resources; and (2) keeping organic leftovers out of the landfill and paying less for trash collection.
Vermicomposting can be a good learning experience for students, and it can be used in gardens to support plant productivity. Vermicompost can be applied directly to the soil or mixed into potting soil at a 10 percent volumetric ratio.
With either strategy, plants will receive important organic compounds, nutrients, and a wide variety of essential microbes.
The Biology of Earthworms
Vermicomposting cannot be done using regular earthworms that you could discover in your garden. These worms, which live in the soil, are incapable of processing huge volumes of organic waste and have poor reproductive abilities in small areas. Instead, redworms or red wigglers are recommended because they breed quickly, live in groups, and frequently stay on the surface while feasting.
There are many different types of vermicomposting worms, particularly Eisenia fetida and E. andrei. Red wigglers have both male and female reproductive organs, making them hermaphrodites. Despite this, the process of mating still needs two worms, each of which provides the other with sperm.
Under ideal settings, a worm bin population can multiply about every 2 months. The “band” around a worm, known as the clitellum, specifies maturity and is reproductively vigorous. Cocoons are about the size of a matchstick head, metamorphosing from pearly white to brown as they develop until one to several baby worms hatch.
Similar to humans, red wigglers demand room temperature (55–85°F) and sufficient moisture for growth. The supply of nutrients and food, as well as the need for space, regulate a worm bin’s population.
If you are a beginner, follow along and learn the process behind a successful vermicomposting!
Constructing a Worm Bin
Earthworms can be raised in a variety of containers. Plastic containers of various sizes are amongst the most popular. Wood can be used to make worm bins, but cedar should not be used because it has antibacterial qualities.
Additionally, commercial bins are available online. Styrofoam containers that are 1-2 inches thick have been shown to be a good substitute for plastic containers with the added benefit of better insulation. These containers can be obtained for free from fish or pet stores. Larger bins, typically 18 inches wide, 24 inches long, and 18 inches deep, are appropriate for larger worm populations. Smaller bins are acceptable for those who are just starting out but will impede population growth.
Bins should have plenty of openings on the bottom and at least two columns of holes running down the middle and bottom of the bin. Bigger holes can be drilled in the bin lid, but they must have a piece of fabric tied over them to keep fruit flies away. Long stakes should be used to lift worm bins off the ground to allow air to flow underneath.
To use as bedding, load roughly halfway of the bin with moist, shredded newspaper. The remaining space should be filled with a handful of potting soil. That will also inoculate the bin with microbes and sand that the worms use to grind food in their gizzards.
The worms can now be added! If you are thinking about where you could get those, online retailers provide them. Beginners can get by with 1,000 worms in new bins with ease, but they should be aware that lower populations will take longer to decompose food waste. To prevent freezing during the winter and excessive heat during the summer, put the bin in a cool, dark area with little temperature difference. Typical sites include basements, but even under a kitchen sink is acceptable.
Worm Bin Management
Worms prefer as few disruptions as possible, which is similar to salutary neglect. For instance, because worms detest light, they stop feeding and look for cover beneath the surface every time the lid is opened. Having said that, they still need to eat and drink. Food waste is frequently used to provide moisture. If more moisture is required, a spray bottle might be used.
Feed leftover fruits, vegetables, and other food preparation trash to the worms. Put the food under the shredded newspaper. Feeding smaller amounts more frequently every 1-2 weeks and distributing each piece in a different spot around the bin is one way to avoid overfeeding. This will enable you to monitor how well the worms are assimilating the previous feeding’s meal.
To adjust the feeding, be careful to pay attention to the desired food ingredients. In addition to causing worms to leave the bin, feeding worms meat, dairy, greasy, or fermented goods will also attract bugs, dangerous bacteria, and unpleasant odors. Generally, worms will eat a wide range of foods, but avoid giving them too much of any one item at a time.
Worm excrement, or castings, is the end result of vermicomposting and is produced as the worms ingest food waste. Castings are held in high regard for plant growth since they are rich in nutrients and microbes. Castings will eventually overflow the bin to the point where it must be harvested.
Getting Your Compost Harvested
The “dump and sort” technique is a straightforward way to collect castings and separate worms from castings. Sort the final material into a number of tiny cone-shaped containers, dump the bin’s contents on a tarp in a well-lit area, and then separate the undigested material. The worms will eventually migrate to the cone’s center after running away from the light. Clean away worm-free castings from the cones’ top and sides gradually until worms are once more visible. The worms will eventually move to the center of the cone’s bottom, leaving you with a little clump of worms. Restart feeding after placing the worms again in the trash.
What Went Wrong: Troubleshooting Worm Bins
It’s normal for seasoned vermicomposters to occasionally lose an entire colony of worms. Numerous factors can result in worm losses, unpleasant odors, and pest and fly aggravations, but preventing problems and swiftly resolving them by returning to a regulated worm bin will make it successful.
Bins that are just too damp may produce unpleasant odors as food is anaerobically degraded or else promote fruit fly infestations. Too-dry bins will inhibit worm growth and feeding. A worm bin’s moisture level can be managed using newspaper that has been torn up, either moist or dry. Another way to manage moisture is by choosing wet or dry food waste. Fruit fly traps, which consist of a tiny vessel with a spoonful of apple cider vinegar and an inverted conical cap with a small opening cut at the bottom of the cone, can be simply used to manage fruit flies, which will be an annoyance at home if food is left out in the open.
Finally, refrain from overfeeding, especially when it comes to food items that shouldn’t be placed in a worm bin.
Want to learn more about interesting plant stuff? Never waste your time and visit our blog section now!

