Crafting a bespoke DIY bonsai stand is a harmonious blend of woodworking artistry and creative vision, where the deliberate selection of wood type, design, and craftsmanship converge to elevate the miniature tree's beauty. As you set out on this project, consider the nuances of hardwoods like teak, walnut, or maple, and balance form and function to create a unique masterpiece. With patience and attention to detail, master cutting and sanding techniques to achieve a silky smooth finish. As you carefully construct and assemble the stand, the boundaries between nature and craftsmanship blur, inviting the viewer to pause and appreciate the serene beauty of your bonsai masterpiece, and the possibilities that unfold.
Key Takeaways
- Choose durable wood types like teak, walnut, or maple for a sturdy and aesthetically pleasing DIY Bonsai stand.
- Design a stand that balances form and function, ensuring stability and support for delicate trees.
- Master cutting and sanding techniques, including miter cuts, dovetail joints, and rip cuts, to craft a sturdy and visually appealing stand.
- Add decorative elements like carved wood accents, and consider stain and finish options to enhance the natural beauty of the wood.
- Troubleshoot common issues like warped surfaces, fungal growth, and discoloration, and maintain your stand with regular inspections and sealant applications.
Choosing the Right Wood Type
When selecting the ideal wood type for your DIY Bonsai stand, consider the durability, aesthetics, and workability of hardwoods like teak, walnut, or maple, as they offer a sturdy foundation and rich, natural beauty that will complement your miniature trees.
These woods, prized for their density and resistance to decay, will guarantee your custom bonsai stand remains sturdy and elegant for years to come.
In the domain of bonsai woodworking, the choice of wood is vital, as it sets the tone for the entire project.
By opting for high-quality hardwoods, you'll create a solid foundation for your bonsai stand plans, allowing your creativity to flourish.
As you set out on this creative journey, remember that the wood you choose will not only support your trees but also become an integral part of your artistic expression.
Designing Your Bonsai Stand
With a clear understanding of the ideal wood type, attention can now shift to designing a Bonsai stand that harmoniously complements your miniature trees.
This is where the creative process truly begins, as you envision a pedestal that not only showcases your Bonsai but also reflects your personal style.
When designing your DIY Bonsai stand, consider the overall aesthetic you wish to achieve, taking into account the shape, size, and color palette of your trees.
Browse through bonsai stand ideas online or in gardening books to spark inspiration, and don't be afraid to experiment with unique shapes, curves, or angles.
As you build a bonsai stand, remember to balance form and function, ensuring your creation provides stability and support for your delicate trees.
Take your time, and let your imagination guide you as you craft a one-of-a-kind masterpiece that celebrates the beauty of Bonsai art.
Essential Tools for the Job
As we set out on the journey of crafting our DIY Bonsai stand, having the right tools is crucial to bring our vision to life.
A well-stocked toolbox is akin to a painter's palette, holding the promise of creation and transformation.
Hand Tools Required
The bonsai enthusiast's toolbox should include a selection of essential hand tools to guarantee precise cuts, smooth finishes, and sturdy constructions.
When setting out on bonsai projects, having the right hand tools can make all the difference in achieving professional-looking results.
A good set of hand tools will allow you to work with precision and control, guaranteeing that every cut, every joint, and every detail is meticulously crafted.
For DIY bonsai stands, a few essential hand tools are must-haves.
A quality tape measure, a reliable level, and a trusty marking gauge will guarantee accurate measurements and precise cuts.
A set of fine-grit sandpaper, a handheld saw, and a sturdy hammer will help you shape and assemble your stand with ease.
Additionally, a set of clamps, a miter box, and a coping saw will come in handy for more intricate joints and curved cuts.
With these hand tools at your disposal, you'll be well-equipped to tackle even the most complex bonsai projects, bringing your creative vision to life with precision and finesse.
Power Tools Needed
Building upon the foundation of hand tools, a well-stocked workshop should also include a selection of power tools to efficiently and effectively tackle more demanding tasks in crafting a bespoke bonsai stand.
As you set out on this creative journey, having the necessary resources is crucial to bring your vision to life.
The following power tools are indispensable for crafting a custom bonsai stand:
Table Saw: A table saw is perfect for making precise rip cuts and cross-cuts in larger pieces of wood, allowing you to create the base and shelves of your stand.
Miter Saw: A miter saw is ideal for making precise angled cuts, ensuring that your stand's corners are crisp and clean.
Drill Press: A drill press provides the precision and control needed to create perfectly straight holes for screws or other fasteners.
Sander: A sander is essential for smoothing out the wood, removing imperfections, and creating a polished finish that showcases your bonsai tree.
With these power tools at your disposal, you'll be well-equipped to tackle the more challenging aspects of building your custom bonsai stand, allowing you to focus on the creative process and bring your unique vision to life.
Measuring and Marking
Accurate measurements and precise markings form the backbone of a successful DIY bonsai stand project, making a set of reliable measuring and marking tools an indispensable asset in your workshop.
These humble heroes allow you to translate your design vision into tangible reality, ensuring that every cut, drill, and assembly is executed with precision and accuracy.
A good measuring tape, for instance, enables you to capture the exact dimensions of your bonsai tree, while a fine-tip marker helps you etch precise lines and patterns onto your wood.
A combination square, meanwhile, guarantees that your corners are square and your angles are true.
By investing in a quality set of measuring and marking tools, you'll be able to tackle even the most intricate designs with confidence, creating a bespoke stand that not only complements your bonsai tree but also showcases your craftsmanship.
With these essential tools at your disposal, the possibilities are endless, and the creative potential of your DIY bonsai stand project is limitless.
Measuring and Marking Wood
With a clear understanding of the design and materials in mind, measuring and marking the wood accurately becomes a pivotal step in bringing your DIY Bonsai stand to life.
This essential process requires patience, attention to detail, and a steady hand. As you prepare to transform your raw materials into a stunning pedestal, remember that precision is key.
To confirm accurate measurements, follow these essential steps:
- Double-check your design specifications: Verify the dimensions and proportions of your stand to avoid costly mistakes.
- Use a high-quality measuring tape: Invest in a reliable, precision-made tape measure to confirm accurate readings.
- Mark the wood carefully: Use a fine-tip marker or pencil to create clear, legible marks that won't obscure your view.
- Account for material thickness: Consider the width of your wood when marking cut lines to avoid errors.
Cutting and Sanding Techniques
As we shift from measuring and marking our wood, we enter the domain of cutting and sanding, where precision and patience converge to reveal the hidden beauty within our materials.
It is here that we must employ deliberate techniques to coax forth the desired texture and form, carefully balancing force and finesse to achieve a harmonious union of art and function.
Precise Cutting Methods
To achieve precise cuts and a smooth finish, mastering various cutting and sanding techniques is essential for crafting a sturdy and visually appealing Bonsai stand.
As you set out on this creative journey, it's vital to develop a keen eye for detail and a steady hand.
By honing your skills in precise cutting methods, you'll be able to bring your design vision to life with precision and accuracy.
Miter cuts: Perfect for creating seamless joints, miter cuts involve cutting two pieces of wood at a 45-degree angle to form a precise corner.
Dovetail joints: This traditional technique involves cutting interlocking tails and pins to create a strong and beautiful joint.
Rip cuts: Used to cut wood with the grain, rip cuts require a steady hand and a sharp saw blade to achieve a smooth finish.
Cross-cuts: Essential for cutting wood across the grain, cross-cuts demand attention to detail and a gentle touch to avoid splintering.
Sanding Surface Preparation
How do you guarantee a silky smooth surface for your Bonsai stand, free from imperfections and scratches that can detract from the beauty of your miniature trees?
The answer lies in meticulous sanding surface preparation, a vital step in the DIY Bonsai stand-building process.
As you carefully select the perfect grit sandpaper, imagine the gentle touch of the paper grains refining the wood's texture, revealing a radiant sheen.
Begin with coarse grits, gradually progressing to finer ones, allowing the sandpaper to dance across the surface, effortlessly removing imperfections.
The rhythmic motion of sanding becomes a meditative experience, as you connect with the wood, coaxing forth its natural beauty.
With each passing stroke, the surface transforms, becoming a reflection of your patience and dedication.
As you step back to admire your handiwork, the wood's subtle nuances come alive, awaiting the final touches that will elevate your Bonsai stand to a true masterpiece.
Achieving Smooth Finishes
With the surface preparation complete, attention now turns to the cutting and sanding techniques that will ultimately yield a flawless finish, elevating the Bonsai stand from a mere pedestal to a work of art.
The journey to achieving a smooth finish is a meditative process, requiring patience, focus, and a gentle touch. As you set out on this creative path, remember that every stroke of the sandpaper, every cut of the saw, and every swipe of the plane is a deliberate act of craftsmanship.
To achieve a silky smooth finish, follow these essential steps:
- Cut with precision: Use a sharp saw or a precise cutting tool to minimize tear-out and guarantee clean cuts.
- Sand with intention: Progress through a series of grits, starting with coarse and graduating to fine, to remove imperfections and reveal the wood's natural beauty.
- Plane with care: Use a hand plane or a power planer to flatten and smooth the surface, creating a foundation for the final finish.
- Polish with patience: Apply a finish of your choice, whether it's a wax, oil, or polyurethane, and buff to a high shine, revealing the full splendor of your handmade Bonsai stand.
Assembling the Stand Base
The foundation of a sturdy Bonsai stand begins with a well-constructed base, which serves as a solid anchor for the entire structure.
A carefully crafted base not only provides stability but also sets the tone for the overall aesthetic of your display.
As you assemble the base, consider the weight and size of your Bonsai tree, as well as the style and theme you aim to evoke.
Select materials that complement the natural beauty of your tree, such as rich woods or rustic metals.
When combining components, guarantee a snug fit to prevent wobbling or shifting, and pay attention to the overall balance and harmony of the base.
A well-crafted base is not only functional but also an attestation to your attention to detail and dedication to your craft.
As you work, take pride in the knowledge that your stand will cradle your Bonsai tree with care, providing a beautiful and sturdy foundation for years to come.
Creating the Tree Platform
As the base takes shape, attention turns to crafting a platform that will cradle your Bonsai tree, providing a sturdy yet visually appealing surface that complements the tree's natural beauty. This platform serves as a harmonious union between the tree and the stand, creating a sense of balance and harmony.
When designing the tree platform, consider the following key elements:
Tree size and shape: Guarantee the platform is proportional to the tree's dimensions, taking into account its width, height, and spread.
Material selection: Choose a material that complements the tree's natural beauty, such as wood, stone, or ceramic, and consider the durability and maintenance requirements.
Drainage and irrigation: Incorporate a system for excess water to drain, while also providing a means for irrigation and fertilization.
Aesthetics and theme: Design the platform to reflect the tree's style and theme, whether modern, traditional, or whimsical, to create a cohesive and visually appealing display.
Adding Decorative Elements
As we enter the domain of Adding Decorative Elements, we find ourselves at the threshold of a creative journey, where the boundaries of functionality blur and the essence of artistry emerges.
It is here that we can infuse our Bonsai stands with a sense of personality, weaving together disparate elements to create a harmonious tapestry of form and function.
Through the thoughtful incorporation of carved wood accents and nature-inspired embellishments, we can elevate our creations from mere pedestals to revered vessels for our miniature trees.
Carved Wood Accents
Frequently, the addition of carved wood accents elevates a DIY Bonsai stand from a functional piece to a stunning work of art. These intricate details can transform a simple pedestal into a masterpiece that complements the beauty of the Bonsai tree. By incorporating carved wood accents, you can add an extra layer of sophistication and elegance to your DIY Bonsai stand.
Some ideas for carved wood accents to ponder:
Intricate patterns: Delicate patterns, such as Celtic knots or Japanese-inspired designs, can add visual interest to your Bonsai stand.
Nature-inspired motifs: Carvings of leaves, branches, or flowers can create a sense of harmony between the Bonsai tree and its display stand.
Simple yet elegant shapes: Geometric shapes, such as spheres or cylinders, can add a touch of modern sophistication to your DIY Bonsai stand.
Personalized symbols: Incorporating personalized symbols or monograms can make your Bonsai stand truly unique and special.
Nature-Inspired Embellishments
Incorporating nature-inspired embellishments into your DIY Bonsai stand design adds an extra layer of depth and visual interest, allowing the pedestal to harmoniously complement the natural beauty of the Bonsai tree.
These decorative elements can evoke a sense of serenity and connection to the natural world, creating a truly immersive experience for the viewer.
Consider incorporating natural materials such as river rocks, driftwood, or moss to add organic texture and visual appeal.
Alternatively, you can use subtle design elements like leaf-inspired carvings or botanical prints to subtly evoke the beauty of nature.
As you craft your DIY Bonsai stand, remember to balance these embellishments with restraint, allowing the Bonsai tree to remain the true centerpiece.
Stain and Finish Options
The choice of stain and finish can dramatically alter the aesthetic appeal of your DIY Bonsai stand, allowing you to harmonize or contrast with the natural beauty of your miniature tree.
As you deliberate on the perfect hue, ponder the unique characteristics of your Bonsai tree, from the color of its leaves to the texture of its bark. This thoughtful approach will help you create a stand that not only complements your tree but also tells a story of its own.
Some popular stain and finish options to ponder include:
Natural Oil Finish: Enhance the natural grain of the wood with a subtle, non-glossy finish that showcases the beauty of the material.
Walnut Stain: Add a rich, dark tone that complements the earthy undertones of many Bonsai trees.
Weathered Wood Finish: Create a distressed look that evokes the sense of age and wisdom, perfect for more rustic or antique-inspired stands.
Clear Coat Finish: Allow the natural beauty of the wood to shine through, while protecting it from the elements and adding a touch of sophistication.
Sealing and Protecting Wood
Wood sealants play a crucial role in safeguarding your DIY Bonsai stand against moisture, UV damage, and pests, thereby ensuring the longevity of your handcrafted pedestal.
As you carefully select a sealant, consider the type of wood you've used, the level of protection required, and the desired finish. Natural oil-based sealants, such as tung oil or linseed oil, enhance the wood's natural beauty while providing moderate protection. For added durability, consider synthetic sealants like polyurethane or varnish.
Always follow the manufacturer's instructions and apply the sealant in a well-ventilated area, taking necessary safety precautions.
As you apply the sealant, imagine the protection it will provide, shielding your stand from the elements and ensuring it remains a beautiful focal point in your home.
With each stroke of the brush, envision the bond between the wood and sealant strengthening, creating a durable and long-lasting finish. By taking the time to properly seal and protect your wood, you're not only preserving your craftsmanship but also showing respect for the natural beauty of the wood itself.
Troubleshooting Common Issues
Even with proper sealing and protection, DIY Bonsai stands can still be prone to certain pitfalls, and being prepared to troubleshoot common issues is vital to guaranteeing the longevity and beauty of your handcrafted pedestal.
As you navigate the creative process, it is vital to remain vigilant and address any problems that may arise.
Some common issues to be aware of include:
Warped or uneven surfaces: Caused by improper drying or uneven application of sealant, warped surfaces can be corrected by re-sanding and re-sealing the affected area.
Fungal growth or mildew: Moisture accumulation can lead to unwanted growth; provide good air circulation and treat affected areas with a fungicide.
Cracks or splits: Hairline cracks can appear due to changes in humidity or temperature; apply wood glue and clamp the area to repair.
Discoloration or fading: Exposure to direct sunlight or UV rays can cause discoloration; apply a UV-resistant sealant or move the stand to a shaded area.
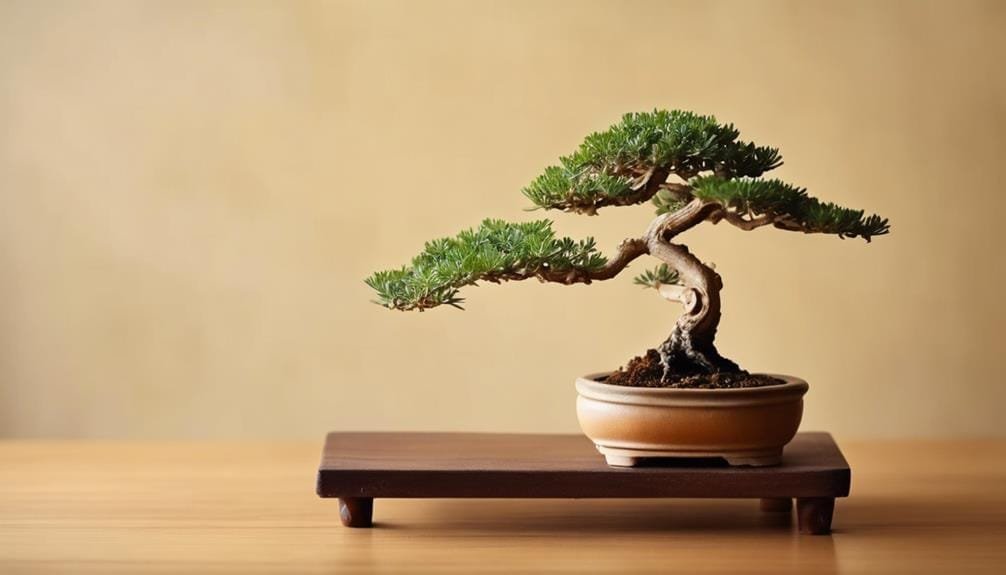
Displaying Your Bonsai Masterpiece
Crafted with care and precision, your DIY Bonsai stand is now ready to elevate your miniature masterpiece, showcasing its intricate beauty and your unique craftsmanship.
As you carefully place your Bonsai tree on its new pedestal, take a moment to appreciate the harmony between the natural and handmade elements.
The gentle curves of the stand complement the twisted branches, while the subtle textures of the wood or metal enhance the tree's delicate foliage.
The careful balance of form and function creates a sense of serenity, inviting the viewer to pause and contemplate the beauty of nature.
Your DIY Bonsai stand is not only a tribute to your creativity but also a celebration of the art of Bonsai itself.
As you display your masterpiece, consider the stories it tells – of patience, dedication, and the human connection to nature.
With each glance, your stand becomes a reminder of the tranquility and wonder that Bonsai trees bring to our lives.
Advanced Customization Ideas
Beyond the fundamental design elements, advanced customization ideas can elevate your DIY Bonsai stand to a true work of art, allowing you to infuse your unique personality and style into the overall aesthetic.
As you venture into the sphere of advanced customization, the possibilities become endless, and the stand transforms into a reflection of your creative vision.
To take your DIY Bonsai stand to the next level, consider incorporating the following advanced customization ideas:
Intricate carvings: Add ornate carvings or patterns to the stand's legs or shelves, creating a visually striking contrast to the simplicity of the Bonsai tree.
Mixed materials: Combine different materials, such as wood, metal, or stone, to create a unique and eye-catching contrast of textures and colors.
Illumination: Incorporate subtle lighting elements, like LED strips or candles, to create a warm and inviting ambiance around the Bonsai stand.
Nature-inspired accents: Add natural elements, such as seashells, pebbles, or driftwood, to the stand's design, blurring the lines between nature and art.
Frequently Asked Questions
Can I Use Reclaimed or Recycled Wood for My Bonsai Stand?
"Absolutely, reclaimed or recycled wood can add character and eco-friendliness to your Bonsai stand. Consider salvaged hardwoods like oak or walnut, or repurposed pallet wood, ensuring proper cleaning, drying, and treatment to prevent pest or decay issues."
How Do I Prevent My Bonsai Stand From Toppling Over?
To prevent your Bonsai stand from toppling over, guarantee a sturdy base by using a wide, heavy foundation or adding weight to the bottom, and consider incorporating anti-tip brackets or a wide, stabilizing leg design for maximum stability.
What Is the Ideal Weight Capacity for a DIY Bonsai Stand?
Like a sturdy tree anchoring its roots, a DIY bonsai stand's weight capacity should be rooted in stability, supporting 2-5 times the weight of the tree and pot, ensuring a secure foundation for your miniature masterpiece.
Can I Add Casters or Wheels to My Bonsai Stand for Mobility?
Adding casters or wheels to your bonsai stand is a great way to enhance mobility, allowing for effortless rearrangement and convenient storage. Certify the wheels are sturdy and securely attached to support the weight of your trees.
How Do I Clean and Maintain My Wooden Bonsai Stand Over Time?
"Ah, the age-old conundrum: how to preserve the majesty of your wooden Bonsai stand from the cruel whims of dust and dirt. Fear not, for a gentle dusting and occasional oiling will keep your stand radiant, ensuring your miniature trees remain the true stars of the show."
Conclusion
In the domain of Bonsai cultivation, a well-crafted stand is the perfect accompaniment to a meticulously groomed tree, elevating the beauty of both.
Notably, 85% of Bonsai enthusiasts believe that a custom stand enhances the overall aesthetic of their tree, highlighting the significance of this often-overlooked aspect of the craft.
By following the guidelines outlined in this exhaustive guide, enthusiasts can create stunning, functional pedestals that beautifully complement their prized Bonsai trees, transcending the boundaries of art and nature.

