Introduction
There are hundreds of members of the Quercus genus, that which contains all of the oaks. There are more than 600 species native to North America alone. Not all of these are amenable to being grown as bonsai. Those that are, however, make lovely and gratifying bonsai subjects.
Oaks are more particular than other plants about when the grower prunes their roots. Oaks demand greater care in that regard than popular maples and conifers.
| Scientific/Botanical Name | Quercus |
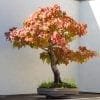
| Description | The genus Quercus consists of hundreds of oak species. Many are not suited to the art of bonsai. The ones that are suitable are much prized for two particular characteristics: Their awe-inspiring tree trunks and their rough, heavily-textured bark that suggests great age. |
| Position | Oak trees require full, direct sun. However, in areas where summers are hot and dry, the trees should be grown where filtered afternoon sun is provided. |
| Watering | Water the tree as needed to keep the soil moist. Do not allow the soil to become dried out. |
| Feeding | In their growing season, feed oak bonsai trees with a balanced liquid fertilizer at half-strength every two weeks. A fertilizer with high nitrogen concentration may be used if the goal is to develop trees with thick trunks. There are no guarantees as to whether a bonsai oak tree will produce acorns or not. |
| Leaf and Branch Pruning | Pruning is best carried out in early spring when the tree burst into vigorous growth, sending out rather elongated shoots. Unwanted/undesired shoots should be cut away immediately. |
| Re-potting & Growing Medium | Re-pot every year in early spring. Roots should only be pruned in the spring before new growth emerges, and this should be done at the time of re-potting. The roots should be pruned only minimally. It is imperative that the roots are not pruned at any other time of the year. Oak trees are ideally grown in soil that is comprised of roughly 60 percent aggregates and 40 percent organic matter. Native North American oaks are adapted to many different soil conditions, and they will thrive in any soil that is suited to the growing of bonsai trees. |
| Wiring | Most oak trees are highly responsive to wiring, especially the pin oak. Any wiring that is undertaken must be done gently so as not to cause damage to the bark, however. The tree is best trained into the formal or informal upright style, but the use of gentle wiring can create cascade styles as well. The tree also looks wonderful when it is trained as a multi-trunk specimen. |
| Notes | There is only one species of oak that is indigenous to Japan, and it is mainly used in the manufacture of drums. As such, oak trees are not generally used in the art of bonsai in Japan. The use and popularity of oak trees as bonsai subjects gained traction during the 1950s in California. |
Oaks As Bonsai Subjects
Some oaks offer the qualities that bonsai artists and growers most want to achieve. Two of these characteristics include predisposition to form impressive trunks and their rough-textured bark that conveys an image of age.
Only one oak is native to Japan, however, and that species traditionally has been a utility tree used to make drums. Oaks have not been traditional bonsai subjects in Japan, but they began gaining popularity in California in the 1950s.
Appropriate Species
The Southern live oak, Quercus virginiana, is one of the most popular evergreen oaks for bonsai. There are other live oaks native to the Western states of the United States, but the Southern live oak often is more widely available.
Live oak species are called “live” because, in their native habitats, they are not deciduous but stay green all year. Q. virginiana is native to the Southern Atlantic coast and all along the Gulf coast. Its leaves are narrowly elliptical to narrowly oval, with smooth margins.
The leaves are heavy and dark green, providing pleasing bonsai foliage. Leaves of live oak species native to the Western United States are similar.
Though Q. virginiana is the most widely used of all of the live oaks commonly used in bonsai, any of the live oak species native to North America are appropriate for bonsai use.
Among the deciduous oaks, likely the pin oak, Quercus palustris, and the Northern pin oak, Quercus ellipsoidalis, are the most accommodating for the bonsai artist. The pin oak has deeply lobed, toothed and pointed leaves, with deep, irregular sinuses extending nearly to the midrib of the leaf.
Pin oaks also have leaves that are somewhat smaller than some other oaks, lending themselves well to being miniaturized through bonsai culture. Q. palustris is native to much of the Eastern portion of the United States and adapts well to a wide range of growing conditions.
General Care For Oak Bonsai Trees
Growing Medium
The growing medium of any oak species should be about 40 percent organic material and 60 percent aggregate or nonorganic substrate. As oaks native to North America grow in all types of local environments, they are quite adaptable to common bonsai growing media.
Root Pruning
This is the area in which oaks present oak-specific challenges in bonsai culture. Whereas the bonsai artist or grower can root prune a maple or pine virtually at any point in the growing season, oaks are much more particular about the timing of root pruning.
Root pruning should be done only in the early spring, after the oak breaks its winter dormancy but before it has gathered much new growth. Missing the annual root pruning altogether is better for an oak bonsai than imposing root pruning at the wrong time of year.
Fertilizing
Virtually all bonsai oaks will need supplemental fertilization during the growing season. As there are no ornamental flowers that the grower would desire, there is less need to withhold nitrogen as is the case with flowering bonsai.
Heavier nitrogen fertilization may be desirable in those plants that the grower is trying to coax into developing heavier trunks, but oaks respond well to a weak solution of balanced fertilizer that addresses both top- and root-growth needs. Bonsai oaks may or may not produce bonsai-sized acorns.
Training
Various live oaks, pin oaks and others respond well to wiring and training. Most oaks are best suited for training into formal upright styles and do less well with windswept or cascading styles. Other than the formal upright style, oaks are well suited for multi-trunk training and for forest bonsai growing.
Sunlight
Oak bonsai plants not only tolerate full sun better than many other bonsai plants, they also need a good bit of direct, full sun, preferably in the form of morning sun that is not so hot and drying during the summer. During hot afternoon hours, oak bonsai need to have filtered sun to full shade.
The sunlight is critical, however. When sited in full shade at all times, oak bonsai often develops dieback or may develop abnormally large leaves. These large leaves are inconsistent with the goal of bonsai, of course. They signal the grower that the plant needs more sunlight than it is getting.
Pruning & Shaping
Oaks are known for throwing long shoots after emerging from winter dormancy. These shoots can contain seven or eight nodes, which can be spaced rather far apart if the plant does not receive sufficient sun during the day.
The grower will need to stay on top of this early growth, because any shoot that the grower does not see as being an integral part of the plant structure in the future will need to be removed right away.
The shaping method preferred for an oak bonsai largely depends on the species. Though the Mediterranean Cork oak responds best to pruning, the pin oak is more suited to wiring. Regardless of species, any oak being wire trained needs to be wired gently.
Gentle wiring avoids damaging the bark that can be quite heavy and striated on some species. On other species, gentle wiring avoids breaking branches that can become brittle.
Recalling how native oaks respond to ice storms or other similar assaults on their branches can help to guide the grower to use wiring very gently. Some of the live oaks – specifically the Coast live oak native to California – can be bent easily with wiring. Other oaks are less willing to be bent into formal bonsai styles.
As is the case with any bonsai subject, the grower will do well to observe full size, native forms in their natural habitats. Those oaks that grow well in the face of coastal winds likely will be most accommodating of wiring into windswept or cascade styles.
In-Depth Tutorial For Growing Oak Bonsai Trees
In this guide, we will share helpful information about Oak Bonsai Trees and teach you how to effectively take care of them. We will be giving you in-depth details about these topics relating to Oak Bonsai.
- Growing Conditions
- Right Watering Technique
- Feeding or Fertilizing
- Leaf and Branch Pruning
- Re-potting and Growing Medium
- Wiring and Shaping Oak Bonsai
Learn more about oak bonsai, so let’s get started now!
1) Growing Conditions
Oak trees are one of the great and underrated bonsai species. They have small leaves and with a tendency of forming rough textured bark and massive trunks. They usually give an impression of an old and huge tree in a great miniature. Oak bonsai species are not native to Japan, which explains why oaks have not been a traditional bonsai species.
Oaks that are specifically grown for bonsai are able to tolerate direct sunlight, needing about 4 hours of direct exposure to the sun per day. However, an oak bonsai should spend the entire day in the full or partial shade. If your oak bonsai sited in full shade, it might develop extremely large leaves or suffer diebacks. Here are some reminders when it comes to growing oak bonsai trees.
Tip #1: Choose an oak tree with a thick trunk and large enough. After acquiring an oak tree suitable for bonsai, put it in a large growing pot and you may begin styling. Otherwise, place it on the ground or in the tub to fatten it up.
Tip #2: Oak bonsai trees grow rapidly with proper lighting and soil medium. It is not uncommon to observe 4 or 5 feet of shoot growth per year from a strong and healthy oak given the right growing conditions.
Tip #3: Oak trees can be developed for bonsai rapidly with the proper pruning, soil mixture, and nutrition programs.
Tip #4: The soil requirement of oak bonsai are similar to deciduous trees since they’re broadleaf evergreens. A mixture of 40% organic matter and 60% aggregate can do well. Oak bonsai should receive supplemental fertilizer during the entire growing season.
Tip #5: Oaks are very sensitive about root disturbance so they should only be re-potted in early spring. Root pruning is kept to a minimum. If you will treat an oak bonsai like you would do in a Japanese Maple, you may end up having a dead oak. A fully styled oak bonsai should have a large pot based on bonsai standards because of the sensitivity of its roots. Oaks don’t produce a significant number flowers, and they may or may not produce bonsai most-sought acorns. The fertilizer program suitable for oak bonsai trees should prioritize nitrogen, which is preferably from blood meal or other organic sources.
Conclusion
Oak bonsai trees should be kept in the shade but are still able to obtain enough sun exposure. They have high sensitivity to root disturbance, so you need to repot your oak bonsai early in spring. Pruning the roots should be minimized to avoid disturbing its sensitive roots. Now that you have an idea about the right growing conditions of oak trees, it is time to proceed with the next step in oak bonsai gardening!
2) Right Watering Technique
Watering is one of the most important aspects of growing oak bonsai. Oak bonsai trees are tolerant to excess water. They can stay moist even in limited availability of water. The general watering technique applies to oak bonsai trees, but make sure that the soil will never dry out completely. It is important to check your oak bonsai every morning and evening to determine if it needs watering.
You’ll need a hose with a sprinkler or can fit with rose to provide the right watering technique to your oak bonsai. You can find functional and beautiful Japanese watering cans online that will allow you to properly water your bonsai plants.
You can invest in a perfect watering system for your oak bonsai. You’ll find a wide selection of copper watering cans, nickel watering cans, and bonsai misters. With bonsai cans and misters, you have a perfect tool to keep and maintain your bonsai collection strong and healthy with the confidence and ease that comes from having the right equipment to do the job correctly.
Here are some tips you can apply when watering your oak bonsai:
Tip #1: Water your bonsai tree regularly at least once a day. The preferable time is during early mornings.
Tip #2: Make sure that your bonsai won’t freeze during winter.
Tip #3: the Proper flow of water is important to encourage the growth and development of healthy roots.
Tip #4: If the soil appears dark and if it feels wet, your oak bonsai won’t need watering. If the soil appears light brown and it feels damp, your bonsai need more water.
Tip #5: Water your bonsai thoroughly until you see the water drains through the pot’s drainage holes in its bottom.
Tip #6: Always remember that the hotter the position of your bonsai is, the more water it will use. If the surface of the soil becomes hard because of hot weather, submerging your oak bonsai in water will help, and so as covering the surface of the soil for about 10 minutes.
Conclusion
It is very important not to let your bonsai dry out completely and avoid keeping your oak bonsai constantly wet. The compost soil should go from wet to feeling damp in between watering. Invest in good quality watering cans to apply the right amount of watering pressure to your bonsai. Check this helpful video to learn more about watering your bonsai plants the right way!
3) Feeding and Fertilizing
Your oak bonsai tree would need NPK (nitrogen, phosphorus, and potassium) as well as minor nutrients like calcium, iron, magnesium, zinc, manganese, molybdenum, boron, cobalt, copper, and nickel. Fertilizers having these micronutrients cost a bit more but it is all worth it, most especially when you’re growing on a small scale.
Nitrogen is the main nutrient for an oak bonsai growth. Nitrogen will make bonsai leaves deep green, large, and create long internodes with enough soil space. This is essential during spring when evergreen and deciduous plants are developing new growth.
To stop forcing the soft new growth that might be damaged by frost, fertilizing high nitrogen should be tapered off towards the end of the growing season.
On the other hand, phosphorus is a very important nutrient in promoting flowering, root growth, strengthening plant cell walls, and fighting diseases. The potassium content aids in proper cellular functioning.
Using a balanced fertilizer works just fine under normal growing conditions, wherein all the numbers on the label of NPK fertilizer are the same such as 5-5-5- or 10-10-10. The higher percentage of nitrogen is suitable for acid conditions and for spring growth.
Most Popular Fertilizers
The most popular bonsai organic fertilizers include cottonseed meal, fish emulsion, and seaweed-based or kelp fertilizers. The most popular inorganic fertilizers are Miracid and Miracle-Gro. The imported fertilizers and bonsai fertilizers are effective but tend to cost a little bit more. The most popular brands are Tosho Omakase and bio gold.
What You Need to Prepare
When fertilizing bonsai, you have to prepare the following:
- Fertilizer of your choice
- Measuring cups
- Tea bags
- Baskets for solid fertilizers
Tips for Fertilizing Bonsai
Tip #1: Remember that when it comes to fertilizing your oak bonsai, the same principles apply whether you’re feeding in containers or in the ground.
Tip #2: Bonsai container mixes don’t contain enough fines or clay in holding nutrients properly, and should be fertilized frequently and heavily to it make up for it. If you like to use this type of mix for bonsai ground growing, you need to fertilize heavily because bonsai mixes have a poor or very low nutrient holding capacity, thus requiring continuous feeding.
Tip #3: If you’re growing in a native sandy loam, there is a reduced need for water and fertilizer. It is difficult to give a set formula due to the great number of factors involved. You need to rely on your bonsai and be good in determining good nutrition by leaf color and growth.
Tip #4: The roots of your bonsai are the primary method to take up nutrients and water, and they’re far more efficient at than their leaves. Although the response may be quicker when the fertilizer is applied to leaves, the roots will take up and store far greater part of nutrients needed. It is fine to do foliar feeding as long as the water runoff ends up on the bonsai roots.
Tip #5: Over fertilizing bonsai trees will often result in salt burn which can be seen it at the margins of the leaves, and they will turn brown and dry out.
Fertilizing is necessary for your bonsai to remain beautiful and healthy. Because your bonsai is growing in a small amount of soil, it is important to replenish the supply of nutrients in the soil periodically. You can use a general-purpose liquid fertilizer that is available at garden centers.
Fertilizers must be used half of their suggested strength. Fertilizers must be applied to bonsai once monthly except in winter. Bonsai trees also respond to foliar feeding, using a water-soluble fertilizer that sprayed every other month.
Step-by-Step Bonsai Fertilizing Guide
Step 1: Select the oak bonsai tree you want.
Step 2: Choose a good brand of fertilizer with the right NPK ratio.
Step 3: Place the solid bonsai fertilizer in mini cups or mini baskets to ensure they’re not eaten by birds or are washed away when watering.
Step 4: Cups are positioned on the surface of the soil.
For Liquid fertilizer…
Step 1: Prepare the bonsai tree you want to apply a liquid bonsai fertilizer.
Step 2: Choose the right brand of liquid fertilizer with the right NPK ratio.
Step 3: Read the instructions on the label of the liquid fertilizer very carefully.
Step 4: Spray the liquid fertilizer into the bonsai tree.
Conclusion
When you apply fertilizer, always read the label of the to avoid overfeeding or underfeeding the oak bonsai plant. There are recommended nutrient levels for various seasons and stages of your bonsai tree’s growth and development that you need to consider.
4) Leaf and Branch Pruning
The English oak is regarded as a sprawling tree that can reach a height of up to 50 feet high, and the canopy reaching 50 feet wide. This oak needs to go dormant during winter. It is popularly grown as an outdoor bonsai in the United States, that naturally grows very large leaves. For a bonsai grower, leaf reduction is a real challenge when dealing with English oak.
What Will You Need to Prepare?
- Bonsai scissors
Important Tip
Re-potting oak bonsai in the spring every year as it begins to form buds. Do this for about 10 years then reduce it to every 2 to 3 years. English oak leaves measures about 4 to 8 inches long. You can reduce the leaf size down to 2 inches or even less by pruning them gently and carefully. English oak bonsai is preferably shaped by pruning because using a wire can cause damage to its attractive bark.
How to Prune Branches and Leaves
Step #1: Pinching off the bud at the top of the bonsai tree once it is as tall as you desire is the first step, and this is referred to as the apical bud. Pinch it before it extends during spring to help in reducing the size of the leaves.
Step #2: Pruning the new spring shoots back to 3/4 to 1 1/8 inch long is recommended. You can accomplish this be using sharp bonsai scissors. Let some of the shoots grow if you like to thicken a part of your oak bonsai.
Step #3: Removing all large leaves in a regular basis would help reduce the growth of overly large leaves, and at the same time, helps in shaping your oak bonsai tree according to your desired shape.
Step #4: Thinning the bonsai leaves on the tips of the branches is a good practice. A swirl of leaves in five or more will allow growth on the branch tips. Pruning all is good but leave the smallest to encourage the new growth of smaller leaves.
How to Prune Roots
Step #1: Prune the oak bonsai when you do repot. Pruning long and thick roots is recommended to encourage the proper growth of smaller roots. Ideally, your oak bonsai should have a dense, lateral shallow ball, and hair roots.
Step #2: Pruning the superfluous surface roots that are exposed should be done. Any remaining roots you see will grow evenly in all different directions on top of the soil.
Step #3: After the first 2 or 3 times you repot your bonsai tree, prune the taproot. The taproot refers to the main root that is growing vertically from the bottom of the tree trunk, providing stability but not obtain nutrients.
Conclusion
English oaks are considered as deciduous bonsai and it should be pruned when shaped instead of wired because of wiring damages the bonsai tree delicate bark. The new shoots that have grown to about 2 to 3 cm should be pruned with the use of a sharp pair of bonsai scissors. Prune back carefully to the first pair of new bonsai leaves. Now, you have a better understanding of leaf and branch pruning of oak bonsai.
5) Repotting and Growing Medium
The roots play a very important role in the health of your bonsai tree because the roots absorb and store water and essential nutrients, providing the support you plant needs for proper growth and development. Allowing your bonsai plant to become root or pot bound causes the formation of a tightly tangled ball of roots. With this condition, the bonsai tree will struggle to absorb nutrition and moisture, and will eventually start to gradually starve to death.
Re-potting your oak bonsai tree on a regular basis will prevent it from experiencing pot bound so that the root system does its work more efficiently. Pruning roots is a crucial part of the re-potting process.
By pruning the leaves and branches of your bonsai tree, it will promote the splitting of limbs into thinner, smaller, and fuller regrowth. This will help keep your bonsai plant small while providing a lush and mature look you desire.
Re-potting allows you to replace or replenish your bonsai compost soil. In nature, a typical tree can extend its roots to its surrounding areas in order to find the right and necessary nutrients and water it needs.
However, for bonsai, they are confined in a small container or pot with very little soil, so they are depleted with nutrients quite quickly. because a fresh mixture is added during re-potting your bonsai plant will receive a nutrient infusion for growth and development.
When is the perfect time to re-pot?
It actually depends on the bonsai species, age, a rate of growth, and size of a container. The younger and actively growing oak bonsai plants need more frequent re-potting as compared to older and mature trees.
If your bonsai tree is growing vigorously, you need to replant every 1 to 2 years to prevent pot bound. For slower growing bonsai trees, they may be left for 3 to 5 years. It is best done during early spring or just before, or as soon as, the bonsai buds start to open.
Things You Will Need When Repotting
Repotting a bonsai tree is a delicate procedure because the roots tend to dry out quite rapidly. It’s a good idea to gather all the required materials and assemble ahead of time. Here are the things you will need:
- Good work area with enough space
- New pot
- Bonsai soil, grit, or screenings
- Root hook or root – used for removing the old soil and untangle the root balls.
- Sharp cutters or shears for root pruning
- Mesh- for covering the drainage holes
- Wire- used for securing the bonsai tree to the container.
- Chopsticks or pencil- to remove air pockets from the new soil.
- Water bottle- used to spray roots.
Step-by-step Guide to Re-potting
Step #1: Prepare the Container or Pot
Threading a length of copper or aluminum wire through the wiring holes, and folding the ends over the pot’s edge is an important step, to keep them out of the way until they are needed. This wire will be used to secure the bonsai tree to the container, that’s why you have to make sure that it’s long enough.
To help prevent soil loss and stop insects from getting through the openings, put a drainage mesh over the pot’s drainage holes.
Cover the bottom part of the pot or container with screenings to provide a good drainage. Next, you can add a second layer of bonsai compost soil. Set aside the pot until needed.
Step #2: Remove the Bonsai from the Container or Pot
To do this, you need to cut the wire from the bottom of the pot and remove the bonsai tree from the container very carefully. If it’s really rooted bound, it may actually be stuck to the sides of the container. Running a root knife gently, or something similar, in between the soil and the container will help in releasing the bonsai plant.
Evaluate your bonsai tree if it needs re-potting. Repotting is necessary if the roots are long and are wrapped around the pot edges. However, if there is still a lot of space for the bonsai roots to grow, you can put the oak bonsai tree back in the pot and check again next year.
Step #3: Root Pruning
Gently remove the soil surface from the bonsai roots using a root hook or soft brush, then carefully untangle the root mass as much as possible, but avoid causing breakage or damage.
Prune long roots because this will encourage the bonsai tree to develop a compact roots system. Remove very large and any rotting roots, and remember to keep everything balanced.
For uneven root structure, prune in such a way that you are able to restore balance.
Typically, your goal is to remove about 33% or 1/3, of the total root mass, from both the sides and the bottom part. The roots will dry out rapidly, so you need to have a water spray bottle readily available if the roots need to be re-moistened.
Step #4: Planting the Bonsai Tree
Place your bonsai tree on the soil, slightly off the center, and ensure that it is at the correct height. Adding more soil below the bonsai plant should be done as needed.
Wrap the copper or aluminum wire over the root ball, twisting together until the bonsai tree is held properly and securely in place. Position the wire so it won’t be obviously seen when the rest of the compost soil is added.
Add the new compost soil in small amounts with the use of a chopstick or pencil to work carefully around the bonsai roots. Just keep adding the recommended bonsai mixture until the container is covered to about 1 cm from the rim, and eliminate air pockets and air spaces. The pot needs to be completely full, however, the soil should not be compacted too much because it can inhibit aeration.
Step #5: After Care
Water the bonsai plant thoroughly to help the compost soil settle and be sure to remove any remaining air spaces or pockets. Add a fungicide to the water to help protect your bonsai.
Keeping your bonsai tree in a sheltered area away from direct exposure to sunlight and a strong gust of winds for at least one month is recommended. Your bonsai may take a long time to recover from the stress of re-potting so you want to protect it as much as you can. Don’t fertilize for 4 weeks following re-potting because this can cause root burn and great damage to your bonsai tree.
Conclusion
Every year, it is important to carefully remove your bonsai tree from its pot or container to check the root system. If its roots are highly visible or are circling around the outside of the soil, then it’s time to re-pot.
Repotting your oak bonsai tree can be time-consuming and a complicated process, but the more you practice it, the more comfortable you’ll become. Your repotting experience will be successful as long as you follow the step-by-step instructions, so you can enjoy beautiful and healthy bonsai. Learn more by watching this video! Happy re-potting!
6) Wiring and Shaping Oak Bonsai
Wiring is an important technique in training and styling bonsai trees. You’re able to bend and reposition the bonsai branches by wrapping a wire around them. It may take a few months before they are set in their new shape, and when the branches are set, the wire should be removed.
What You Will Need
Use the right material for wiring, and the two types of wire that can be used are annealed copper and anodized aluminum. Harder copper wires are used for pines and conifers, while aluminum wires are used for deciduous bonsai species. For beginners, it is advisable to use anodized aluminum wire because it is easier to work with and is available in most bonsai shops.
A wire is available in different thicknesses that vary between 1 to 8 mm. There’s no need to buy all the available wires. To start out with, you can buy 1 mm, 1.5 mm, 2.5 mm and 4 mm thick wire. When it comes to wiring thick branches, wrapping them first with raffia soaked in water is highly recommended to protect the bonsai branches from damage caused by the wire when they are bent.
Step-by-step Guide to Wiring an Oak Bonsai
Part 1: How to Double Wire a Bonsai
Step #1: Choose a pair of bonsai branches you desire to wire. They have to be of a similar thickness and should be located near to each other on the bonsai tree. Remember that the wire should be wrapped around the trunk at least once (but preferably twice) so it won’t move when you’re bending the bonsai branches later on.
Step #2: Cutting off the right wire length to wrap around both branches should be done carefully.
Step #3: Begin by wrapping the wire around the bonsai trunk and then proceed with the first bonsai branch. Wiring from the base of the branch toward the very tip prior to wiring the other branch should be done. The wire should be wrapped at 45-degree angle around the branch. In this way, the wire will allow the bonsai tree to grow thicker while maintaining its new shape.
Step #4: When you are planning to bend a branch downwards directly at the trunk, just make sure that the wire comes from below. When bending a branch upwards, the wire should come from above.
Step #5: After you’ve wired all pairs of branches, just continue wiring the other remaining branches with the use of the single-wiring technique.
Part 2: How to Single Wire a Bonsai
Step #1: Same as the double-wiring technique, just cut off the right wire length and begin wrapping it at least twice at a 45-degree angle around the trunk.
Step #2: When you apply multiple wires at the same location of the branch or trunk, try to put them gently and neatly in line.
Step #3: Now, just continue wiring the branch.
Step #4: After wiring the entire bonsai tree, it is time to start bending and repositioning the branches. Hold the outside of the branch with your fingers, and bend the branch starting from the inside of the curve using your thumbs to reduce the risk of splitting the branches by spreading the force outside of the branch.
Step #5: When a branch is in its desired position, you need to stop moving it because repeated bending may damage the branch. Bend straight sections of bonsai branches slightly to make them look more natural.
Place the bonsai tree in the shade. Fertilize your bonsai tree as you would normally do. Observe closely during the growing season and remove wires at the right time to prevent them from cutting or causing wounds to the bark. Don’t recycle wire by unwinding it because it can cause damage to your bonsai tree. Cut the wire on each turn to remove it easily.
Conclusion
Wiring bonsai tree is an effective way to achieve the shape and form you desire. Now that you have gained the knowledge of wiring, it is time to apply them, you can watch this helpful video to better have a good grasp of wiring bonsai the right way!
Final Thoughts
Caring for your oak bonsai tree is pretty much the same with other types of bonsai species. They are suitable for bonsai are known for two specific characteristics, because of their heavily-textured bark and beautiful and awe-inspiring tree trunks that suggest great age.
We hope that you have enjoyed this helpful guide and would be happy to share it with your friends through your social media account. You can also write your comment below and share your experiences growing oak bonsai. Happy oak bonsai growing today!